Hey Guys, quick post, I'm still alive, busy bee so haven't got around to posting in some time. The board is glassed and painted, just putting the fins on, have photos of it all to that point, but have run out of Resin, It seems like I did one too many repairs for mates using my own resin and it happened to use the amount that I needed for this job haha.
I do have another couple of projects on the go as well, One a pallet Head Board for my Sister and Brother-in-law, and the other, just a simple step made from recycled pallets.......sensing a theme? Correct!
I also have a huge project on at work which is tying up all my free time, We have a 60foot Launch ( 17.9 metre) which is getting a total re-paint.
Anyway, thought I'd let you know
post ya soon
Nick
The Graveyard
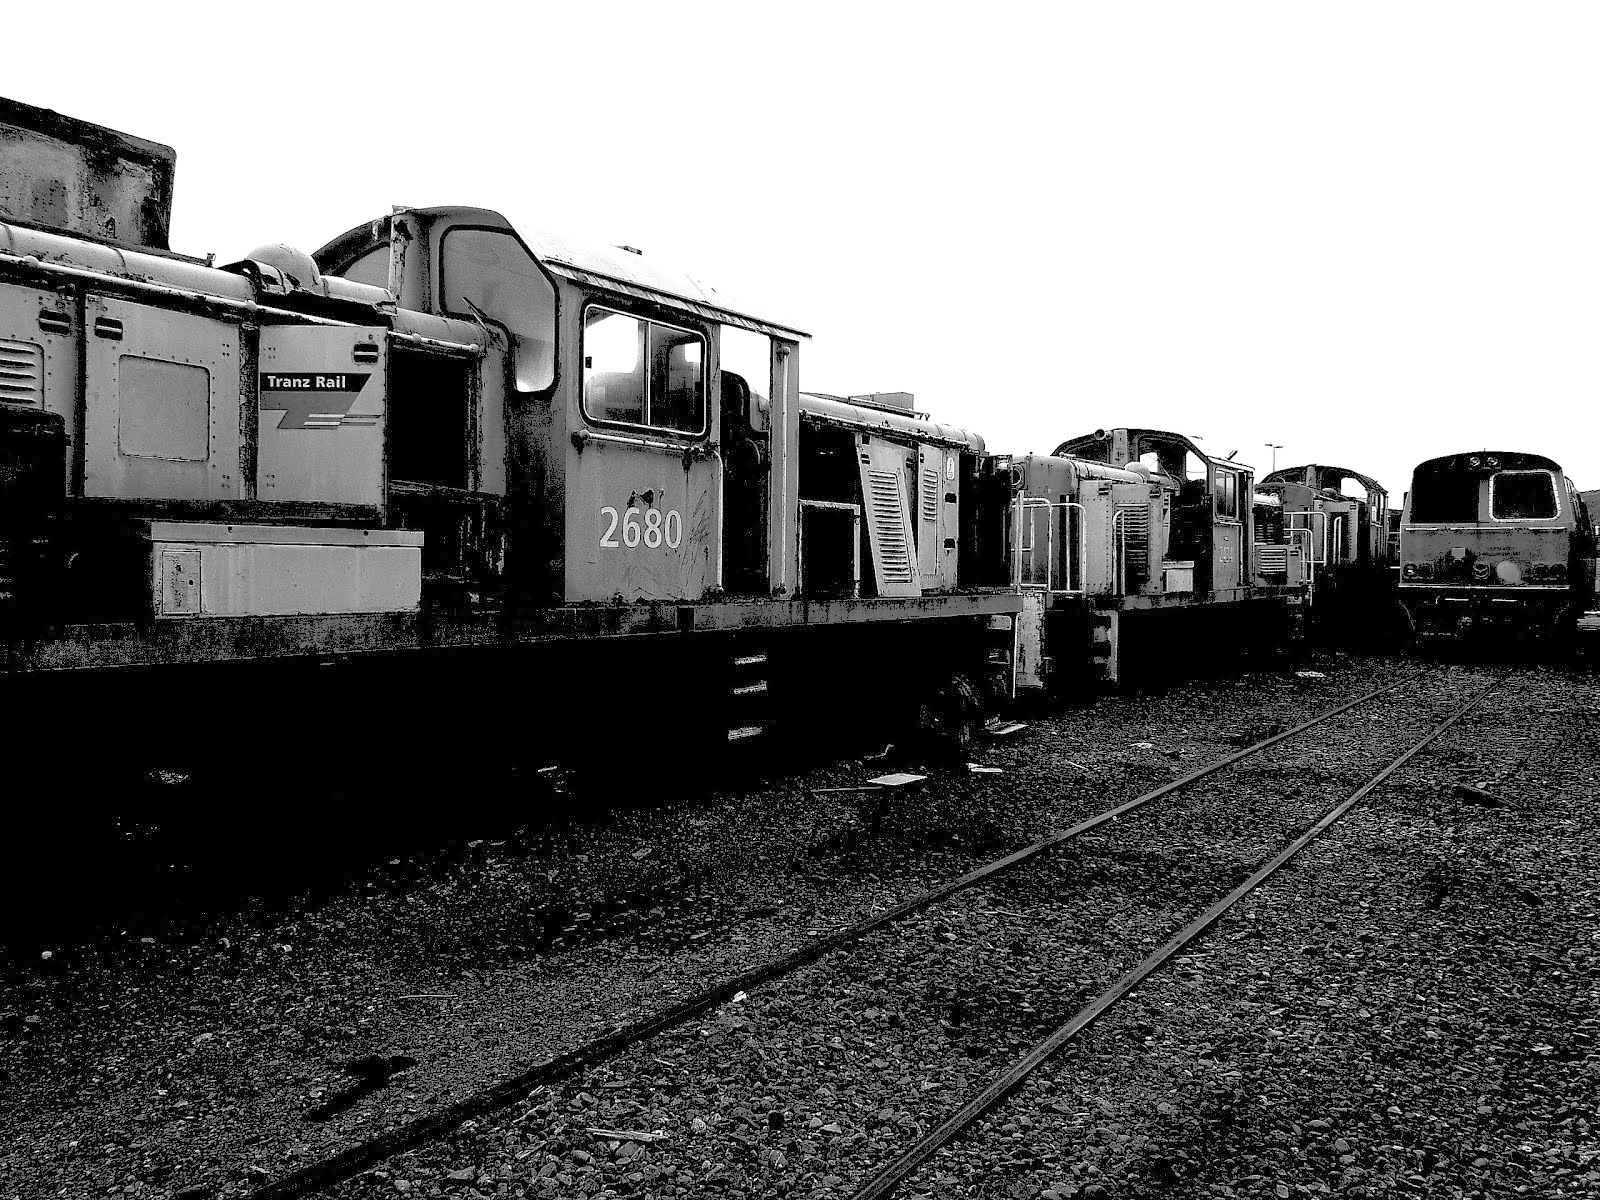
The final resting place for old Loco's and shunts
Saturday 14 July 2012
Sunday 19 February 2012
Standing Around
Well, Its been a little while since my last post, and even though I haven't done any more on the board, I have made some new and desperately needed stands. I may have also been side tracked by the ideas for more projects.
The stands I'm talking about make it easier to work on boards, you can lie them flat or turn them on edge to work the rails of the board. My last ones were made small and would be placed on my work bench, Nothing wrong with that concept, but they left very little room underneath to let me glass rails properly, so the new set has been made a wee bit bigger.

The new stands are made from plywood, foam and concrete ( Nightmare concrete.) I started off with 12mm ply ( plywood).Now this isn't thick enough to support the board properly, so I made a template and cut out 6 stand shapes, 3 for each stand, and glued them together.
The next step was to put these onto legs, and then to put a base on them to hold them in place when I used them.
The concrete I used for the bases gave me a real hard time. Against my better judgment, I read the label on the back of the pack to see how to mix it. The recommendation was to place the water needed in the hole, then to dump the concrete in and mix. I had a couple of differences with the situation it explained. 1: I wasn't putting a post in the ground, just pouring it into 2 cut down bucket molds, 2: the instructions said not to mix first then pour into the hole, the reason for this being that it was quick set and would more than likely start setting before I finished mixing and 3: I wasn't going to use a whole bag.
My plan of attack on this was to mix it in thirds, that way I only needed a Litre of water for each batch, This was the easy part as my mixing bucket happened to have Litre measurements on the inside. It dawned om me at this point that I had no way of accurately measuring out a third of 25kgs, the size of the bag of cement. So, the eye-chrometer came into effect. Not wise. Not wise at all. In my haste and panic of using quick set cement, I poured in all the cement I figured I'd need, Mistake 1.
What I should've done is what I do at work when making Polyester filler, resin first, then slowly add the powders to make a consistency we find most desired.
So with a rapidly setting brew of cement that was a bit too dry, I poured it into 1 of the molds. This didn't go as well as I'd have liked, it was setting and hard to pour, also the stand itself was getting in the way, Idea!! take it out then place it back in after. This very nearly worked properly. I had to get the stand all the way to the bottom of the cement to ensure the same height was achieved on both stands, what was unknown to me at the time was that it had lodged itself on some aggregate and was sitting 15mm higher than I had anticipated.
Stand 2 went pretty much the same way only that I had help in the form of my Partner holding the stand for me, Thank You very much!!. With this help, the base was kept at the height I had planned, and when set and standing back to admire my work, suddenly realised the difference in height and could do nothing about it.
The next day I up ended the stands to see If the bottoms were okay. The first one was, the second needed filling, mainly due to the fact that when I picked it up a dry patch fell out. So after learning my lesson, I mixed the cement how I should've the day before, and made a perfect mix that didn't set before I finished smoothing it out.
This being done and left to set, I removed the molds and now have 2 stands ready for the week ahead, the week I am planning to glass the board up.
Well, I shall be off now, and hopefully won't be as long getting around to the next post for you all.
Nick.
The stands I'm talking about make it easier to work on boards, you can lie them flat or turn them on edge to work the rails of the board. My last ones were made small and would be placed on my work bench, Nothing wrong with that concept, but they left very little room underneath to let me glass rails properly, so the new set has been made a wee bit bigger.
 |
| The Original stands I use. |

The new stands are made from plywood, foam and concrete ( Nightmare concrete.) I started off with 12mm ply ( plywood).Now this isn't thick enough to support the board properly, so I made a template and cut out 6 stand shapes, 3 for each stand, and glued them together.
 | ||
| The Template. |
 |
| Starting the mass producing process. |
 |
| One glued and screwed, and the remaining 3. |
 |
| The 3 glued and screwed. |
 |
| Pre-base stand. |
 |
| Completed stands. |
The concrete I used for the bases gave me a real hard time. Against my better judgment, I read the label on the back of the pack to see how to mix it. The recommendation was to place the water needed in the hole, then to dump the concrete in and mix. I had a couple of differences with the situation it explained. 1: I wasn't putting a post in the ground, just pouring it into 2 cut down bucket molds, 2: the instructions said not to mix first then pour into the hole, the reason for this being that it was quick set and would more than likely start setting before I finished mixing and 3: I wasn't going to use a whole bag.
My plan of attack on this was to mix it in thirds, that way I only needed a Litre of water for each batch, This was the easy part as my mixing bucket happened to have Litre measurements on the inside. It dawned om me at this point that I had no way of accurately measuring out a third of 25kgs, the size of the bag of cement. So, the eye-chrometer came into effect. Not wise. Not wise at all. In my haste and panic of using quick set cement, I poured in all the cement I figured I'd need, Mistake 1.
What I should've done is what I do at work when making Polyester filler, resin first, then slowly add the powders to make a consistency we find most desired.
So with a rapidly setting brew of cement that was a bit too dry, I poured it into 1 of the molds. This didn't go as well as I'd have liked, it was setting and hard to pour, also the stand itself was getting in the way, Idea!! take it out then place it back in after. This very nearly worked properly. I had to get the stand all the way to the bottom of the cement to ensure the same height was achieved on both stands, what was unknown to me at the time was that it had lodged itself on some aggregate and was sitting 15mm higher than I had anticipated.
Stand 2 went pretty much the same way only that I had help in the form of my Partner holding the stand for me, Thank You very much!!. With this help, the base was kept at the height I had planned, and when set and standing back to admire my work, suddenly realised the difference in height and could do nothing about it.
The next day I up ended the stands to see If the bottoms were okay. The first one was, the second needed filling, mainly due to the fact that when I picked it up a dry patch fell out. So after learning my lesson, I mixed the cement how I should've the day before, and made a perfect mix that didn't set before I finished smoothing it out.
This being done and left to set, I removed the molds and now have 2 stands ready for the week ahead, the week I am planning to glass the board up.
Well, I shall be off now, and hopefully won't be as long getting around to the next post for you all.
Nick.
Tuesday 31 January 2012
Shedding its Skin
So I've kind of cheated at this point, I had already stripped off the glass from the board before I set up the blog. Due to this cheating process I actually have no photos during that phase ( Sorry my bad).
Stripping off the glass in this case was easy enough, It was so badly de-laminated that there was very little resistance from the Foam-Fibreglass bond. However, I did run into a few issues. First issue, At the nose of the board there had been a repair done, more or less a hack job, Which meant that as I pulled the glass away, it also took a good portion of the nose and tip of the stringer with it ( The stringer is a thin piece of wood that runs down the entire length of the board, these are also found in the hulls of boats and prevent the board/hull from flexing a ridiculous amount). To solve this, I had to re foam the nose and shape it, Ideally I should've tried to insert a new piece of stringer then foamed it, but, I didn't have any wood around to replace this with, and it is in fact quite small. Just to make sure though, I will place one layer extra of glass over this section.
The next snag was at the other end, The Tail. This too had half done repair, well, I say half done. It was actually just a repair to water proof the end, it had a little part of the tail gone and rather than the previous owner wanting to get water in the foam, he did a quick resin/glass repair. This would mean that I had to re foam and shape the tail again, which was shaped as they call " a Swallow Tail". Like the bird. Instead, I decided to straighten the tail out into a "Squash Tail" shape. Tail shapes also change how the board performs, This link will provide a break down for you:http://www.surfscience.com/topics/surfboard-anatomy/tail/basic-tail-shapes
So, with my saw in hand, I reshaped the basic shape of the tail, then finished it off with a Sanding block and piece of sandpaper. 5 minutes later, TA DA!! new tail
For the most part, as bad as it looked before the glass came off, the condition of the foam wasn't to bad, I mean it had it's dents and dings, but no gouges or breaks. There was of course the problem of the holes in it, and, as what happens usually when you go under the surface of things, something quite unexpected.
This Unexpected "thing" ( I say "thing" because I still can't figure out what it is). Now, during my time repairing boats, you get pretty good at knowing what has happened, Despite the owner claiming other reasons, eg. " No the chain broke and the boat came off the trailer" not " I forgot to put the chain on my boat, then drove off causing it to come off the trailer". But this has me stumped.
What we are looking at in the photo above is a very solid patch of almost plastic like material. The 2 white dots go all the way through ( more holes), so it is definitely a filler of some sort, but not like any I have come across before. The problem this causes is the fact that I can't sand it out. Sanding hard substances next to soft ones will cause you to eat away at the softer material before the harder material is gone. Solution? Well this one is a tough one, I tired to put foam around it to fill the little change in height, this hasn't really worked, Next thing is just to go ahead and glass the board and place some more resin through this area. This will work as it is the only option really left.
This would be a good time to describe the foam i'm using. Its called Endurathane. It comes in two parts, Part A, and Part B. You laugh now, but the reason we call it this is because Part A contains a chemical called Methylenebisphenyldiisocyanate. And Part B contains some really unhealthy stuff as well, so best we call it B instead. The foam is mixed in equal parts, and rapidly reacts to make a closed cell foam. The reaction causes heat ( Exothermic Reaction) and is best used in a well ventilated area along with proper safety gear.
After the tail and nose were complete, I took time look over the board and fill in any dents, and the holes, that would be too big to fill with resin during the next step. Now I can get set up and glass.
Not sure when I'll get around to glassing the board, so I may be a while updating the blog. My hurry up though is that foam has a tendency to draw moisture into it, so I will need to hurry up and get it done before too much moisture is absorbed and needs drying back out.
Nick
 | |
| The underside. |
 |
| The top side ( complete with paint test). |
Stripping off the glass in this case was easy enough, It was so badly de-laminated that there was very little resistance from the Foam-Fibreglass bond. However, I did run into a few issues. First issue, At the nose of the board there had been a repair done, more or less a hack job, Which meant that as I pulled the glass away, it also took a good portion of the nose and tip of the stringer with it ( The stringer is a thin piece of wood that runs down the entire length of the board, these are also found in the hulls of boats and prevent the board/hull from flexing a ridiculous amount). To solve this, I had to re foam the nose and shape it, Ideally I should've tried to insert a new piece of stringer then foamed it, but, I didn't have any wood around to replace this with, and it is in fact quite small. Just to make sure though, I will place one layer extra of glass over this section.
The next snag was at the other end, The Tail. This too had half done repair, well, I say half done. It was actually just a repair to water proof the end, it had a little part of the tail gone and rather than the previous owner wanting to get water in the foam, he did a quick resin/glass repair. This would mean that I had to re foam and shape the tail again, which was shaped as they call " a Swallow Tail". Like the bird. Instead, I decided to straighten the tail out into a "Squash Tail" shape. Tail shapes also change how the board performs, This link will provide a break down for you:http://www.surfscience.com/topics/surfboard-anatomy/tail/basic-tail-shapes
 |
| My new tail. |
For the most part, as bad as it looked before the glass came off, the condition of the foam wasn't to bad, I mean it had it's dents and dings, but no gouges or breaks. There was of course the problem of the holes in it, and, as what happens usually when you go under the surface of things, something quite unexpected.
 | |
| The Unexpected. |
This Unexpected "thing" ( I say "thing" because I still can't figure out what it is). Now, during my time repairing boats, you get pretty good at knowing what has happened, Despite the owner claiming other reasons, eg. " No the chain broke and the boat came off the trailer" not " I forgot to put the chain on my boat, then drove off causing it to come off the trailer". But this has me stumped.
What we are looking at in the photo above is a very solid patch of almost plastic like material. The 2 white dots go all the way through ( more holes), so it is definitely a filler of some sort, but not like any I have come across before. The problem this causes is the fact that I can't sand it out. Sanding hard substances next to soft ones will cause you to eat away at the softer material before the harder material is gone. Solution? Well this one is a tough one, I tired to put foam around it to fill the little change in height, this hasn't really worked, Next thing is just to go ahead and glass the board and place some more resin through this area. This will work as it is the only option really left.
This would be a good time to describe the foam i'm using. Its called Endurathane. It comes in two parts, Part A, and Part B. You laugh now, but the reason we call it this is because Part A contains a chemical called Methylenebisphenyldiisocyanate. And Part B contains some really unhealthy stuff as well, so best we call it B instead. The foam is mixed in equal parts, and rapidly reacts to make a closed cell foam. The reaction causes heat ( Exothermic Reaction) and is best used in a well ventilated area along with proper safety gear.
 | ||
| Foam from after the reaction of the 2 parts, Mixture was only about 2grams of each part, 32grams will fill a cubic metre |
 |
| Under the surface, it was a nice surprise to find the original surf shop that shaped it. It also had a dent that needed filling. |
 |
| A rather large dent in the rail, filled and awaiting fibreglass. |
 | |
| A Bruce Fitzgerald graphic was once here. |
Nick
Friday 27 January 2012
The Show begins
When I was around 17-18, I got onto a surf board for the first time. Until this point I had thought of surfing as easy, whenever I saw it on the tv I imagined it didn't take much skill
I couldn't have been more wrong if I'd tried!!
What came out of this first venture on a surfboard, was the "bug" which most surfers will tell you, gets you on the very first try, and is very hard to shake off. My first attempt to surf was at Matarangi, in the Coromandel, NZ . I still laugh at this, Matarangi, for the most part, barely gets any surf, its just not a surf beach at all. Needless to say though surfing and board shaping was something that I saw go hand in hand with my new job at the time, the world of boat building. I've always wanted to shape my own board, but practicing on repairing old boards seems more logical to me.
So, the first project that has tickled my fancy and, conveniently , just started, is an old Bruce Fitzgerald surfboard.

From this photo, which was the photo I saw when I was bidding on it, doesn't look too bad. Whoever had it at one point brought it upon themselves to turn it into a tow in board ( I assume) On the deck where the foot pads are, you can just make out holes on either side of them, these holes go straight through the board and have had bolts through them to hold ,what i can only guess at, straps or bindings for the feet to hook into. A Lesson in deception here too, what this photo doesn't show, is the serious amount of de-lamination from the tail to about halfway up the board. My heart sank a bit when I found this out, but it was just the start

Welcome to the underside of the board. A mess of repainted re done glassing that on this side, is totally de-laminated...
Not much more to say about the bottom really. I was hoping it would be a glass up on the bottom and a simple case of filling the holes with some foam and patching them up too, but alas, The whole lot has to come off so I can see what is really going on under there.
Also to note about this, is that, someone has cut the fins off. As yet another assumption ( well really a very well educated guess, seeing as how a big part of my job is also Boat repairs ) for the board to have been mounted at some point, weather as an artistic piece for a wall, an advertising sign, or table of some sort , is anyone's guess.
You may also be able to see at the end of the tail, what they call "channels". "Channels" are there to propel more water through the board and turn that flow into more momentum , ie, a quicker board. This was previously a tri fin board or "Thruster" that is, it had 3 fins, 2 on angles and 1 set a bit further back in the middle but in line with the stringer of the board.
At this moment in time, I have opted to turn this into a Quad fin board. I have absolutely no idea if this is a good option, but I still think i'll do it, If not just have a board with 4 fins on it.
Quad fin boards offer more speed. They way the fins are set means there is no middle fin to provide drag or resistance through the water. Of course, there are trade offs for having 4 fins, but to go into detail would bore some people. I've found a great site that covers all the terms I've mentioned here, and goes into way further details about all this related to surf board construction
http://www.surfscience.com/
This isn't the first board I've played around with, the first was and Al Merrick board ( Al Merrick can be regarded as the God Father of board shaping) Again like this board, it was in shoddy condition, but after a bit of T.L.C fibre glass, q-cell, and paint, She looked as good as new.......The Q-cell is a filler mixed with resin to form a bog, lighter in weight than a standard marine filler, and used in minor board repairs. The board came out a bit nose heavy, and overall, heavier than it should've been, but I double glassed it all with heavy Fibre glass ( 2 layers of 6oz mat on each side)
Here are some photos of that project


The Name Asylum Industries, comes from and Korn DVD that I used to have in college called Asylum. I loved the band and the Dvd, the name stuck in my head and picked up the industries part when I day dreamed of owning my own Company that would make boards and do custom paint jobs, Something I would still like to do, but I'm certain I need more experience to do so
 The Graphics were provided for me by a guy Called Steve Roach who owns "Letter rip Ltd" a sinage company Rayglass boats use for their graphics
 A base coat of white then a coat of pearl and then a clear coat with pearl put in it, and this is what you get, A board that you no longer want to use in case you scratch it. This board also lights up like a lure in the water when the sun hits it, I sold this bad boy in the end
 So with the first project under way, I guess I'll see you when I do the next step, Ciao for now
Nick
I couldn't have been more wrong if I'd tried!!
What came out of this first venture on a surfboard, was the "bug" which most surfers will tell you, gets you on the very first try, and is very hard to shake off. My first attempt to surf was at Matarangi, in the Coromandel, NZ . I still laugh at this, Matarangi, for the most part, barely gets any surf, its just not a surf beach at all. Needless to say though surfing and board shaping was something that I saw go hand in hand with my new job at the time, the world of boat building. I've always wanted to shape my own board, but practicing on repairing old boards seems more logical to me.
So, the first project that has tickled my fancy and, conveniently , just started, is an old Bruce Fitzgerald surfboard.
From this photo, which was the photo I saw when I was bidding on it, doesn't look too bad. Whoever had it at one point brought it upon themselves to turn it into a tow in board ( I assume) On the deck where the foot pads are, you can just make out holes on either side of them, these holes go straight through the board and have had bolts through them to hold ,what i can only guess at, straps or bindings for the feet to hook into. A Lesson in deception here too, what this photo doesn't show, is the serious amount of de-lamination from the tail to about halfway up the board. My heart sank a bit when I found this out, but it was just the start
Welcome to the underside of the board. A mess of repainted re done glassing that on this side, is totally de-laminated...
Not much more to say about the bottom really. I was hoping it would be a glass up on the bottom and a simple case of filling the holes with some foam and patching them up too, but alas, The whole lot has to come off so I can see what is really going on under there.
Also to note about this, is that, someone has cut the fins off. As yet another assumption ( well really a very well educated guess, seeing as how a big part of my job is also Boat repairs ) for the board to have been mounted at some point, weather as an artistic piece for a wall, an advertising sign, or table of some sort , is anyone's guess.
 | |
| A typical thruster set up |
Quad fin boards offer more speed. They way the fins are set means there is no middle fin to provide drag or resistance through the water. Of course, there are trade offs for having 4 fins, but to go into detail would bore some people. I've found a great site that covers all the terms I've mentioned here, and goes into way further details about all this related to surf board construction
http://www.surfscience.com/
This isn't the first board I've played around with, the first was and Al Merrick board ( Al Merrick can be regarded as the God Father of board shaping) Again like this board, it was in shoddy condition, but after a bit of T.L.C fibre glass, q-cell, and paint, She looked as good as new.......The Q-cell is a filler mixed with resin to form a bog, lighter in weight than a standard marine filler, and used in minor board repairs. The board came out a bit nose heavy, and overall, heavier than it should've been, but I double glassed it all with heavy Fibre glass ( 2 layers of 6oz mat on each side)
Here are some photos of that project
 |
| I later found out that this board had snapped twice. Once in the middle and once at the nose |
 |
| Weather you know what you're looking at or not, I think we can agree, This is bad |
 |
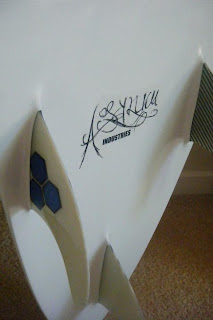
| Asylum Industries, the name I've had in my head head for years for a company, And now the name I use when Fix or modify stuff. |
Nick
The First Step
Well if this isn't a step into the unknown for me, then I have no idea what is.
I guess now is as good a time as any to give an insight into who I am, what this blog is about and what I hope to achieve from it.
My name is Nick (deduct 10 points if you didn't guess that one) Born in the greatest country in the world, New Zealand ( Yes I know it's got its faults and doesn't have what other countries can offer, but the feeling I get from being here can't be found or bought anywhere else).
During schooling I realised ( quite late!!) that I was always better at hands on stuff, you know, learning by getting involved physically, Doing, rather than sitting and reading. The result of this lead me to get into my current line of work as a Boat builder/ painter. I've been doing this line of work for nearly 10 years ( exactly 10 very soon) and still feel like the eager 18 year old who walked into the factory all those years ago when I deal with the daily grind of the work. Admittedly I did have a " Rip, Shit, and Bust" way of doing things back then, and on occasions still do, But I Refined this over time.
What has never disappeared though, Is an urge to make stuff from other things, or to modify things into something better, or even just to restore someones neglected item they flogged off to make a bit of coin.
This is where the blog comes in. I've thought about it for a while now, actually, ever since my friend Derrek started a blog of a Musical Elephant he was making. I like to do projects every so often, They stop me from being bored and depressed, Two symptoms I run into quite a bit, and also its just fun to make stuff!
Unfortunately, there has been a couple of sweet as projects I've finished before I started this blog, I'll post some pictures of the final product, but I don't have any pictures to show the steps or progress I had made on them getting the final result ( It may also be a good time to point out that I have only just started using my camera more often too. I tend to enjoy the moment rather than enjoy a photo of the moment afterwards)
So, from all this ranting and raving above, This blog is for me to share the projects I find myself doing, Help drag me into the modern world of the internet era, help me finding my way around a computer ( you have no idea how long this has taken to write so far!! HA!) To stave off boredom by doing something new, exciting (hopefully)and out of my comfort zone.
Most of all, I guess its just to have fun, After all the saying is " Life's too short"
So, Hopefully if you've sat and read all of this, you'd like to join me on this little journey?, I've no idea where we'll end up, what we'll learn or even if some of the stuff we do will be successful,
You just never know.
Nick
Subscribe to:
Posts (Atom)